








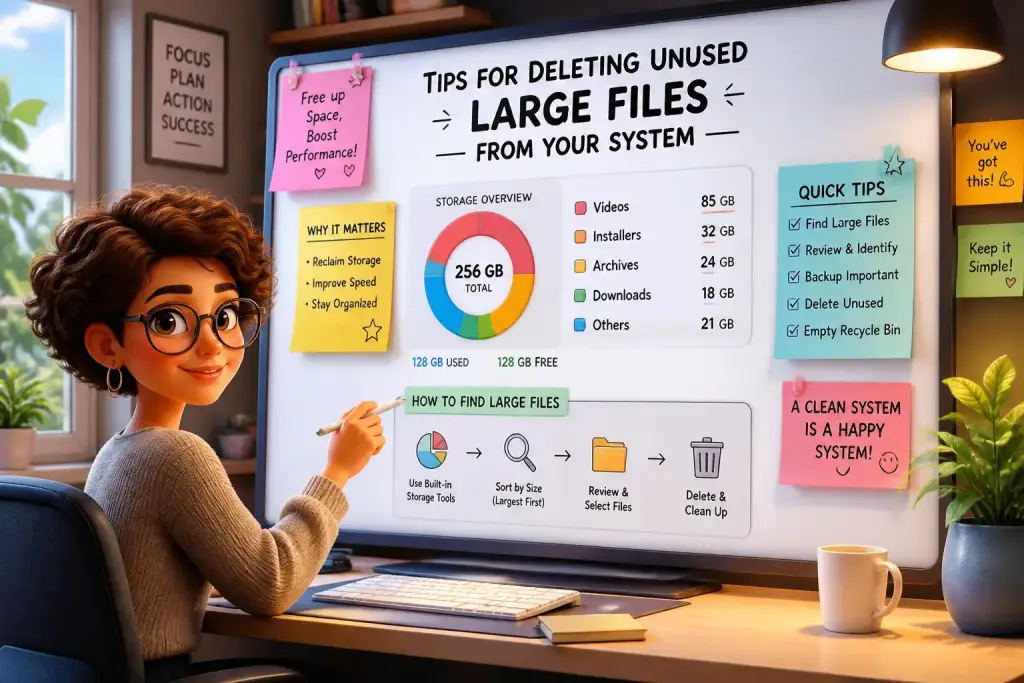
Managing computer storage effectively is key to maintaining optimal performance. Large files can accumulate over time, often taking up valuable space that slows down your system. Knowing how to delete large files that you no longer need can free up significant storage, improving your computer’s speed and functionality. This article offers actionable tips on how to identify and delete these files, ensuring your system runs smoothly.
- Identify large files using built-in tools or third-party software.
- Backup important files before deletion to avoid losing data.
- Regularly check for unused files to maintain optimal performance.
Table of Contents
Identifying Large Files on Your System
The first step in deleting unused large files is to identify them. Most operating systems have built-in tools that help you locate large files easily. For instance, Windows users can utilize the built-in File Explorer to sort files by size. Simply open File Explorer, navigate to the folder you want to check, and select ‘Sort by’ in the top menu, then choose ‘Size.’ On macOS, you can use Finder to display file sizes by selecting ‘Show Inspector’ from the ‘File’ menu.
Third-party software can also assist in identifying large files. Tools like WinDirStat or Disk Inventory X provide a visual representation of your storage. These applications allow you to see which files consume the most space, making it easier to decide what to delete. For example, with WinDirStat, you can view a colorful map of your disk usage, which helps pinpoint large files quickly.
Using Disk Cleanup Tools
Many systems come equipped with disk cleanup utilities designed to help users recover space. For Windows, the Disk Cleanup tool can be accessed by searching for it in the Start menu. Running this tool analyzes your system for temporary files, system files, and more. You can select the files you wish to delete, including large files that are no longer necessary.
- Open the Start menu and type ‘Disk Cleanup.’
- Select the drive you want to clean up, usually the C: drive.
- Check the boxes next to the file types you want to delete, including ‘Temporary files’ and ‘Recycle Bin.’
- Click ‘OK’ to begin the cleanup process.
Backing Up Important Files
Before you start deleting files, it is essential to back up any important data. Accidental deletions can happen, and losing crucial files can be very disruptive. Consider using external hard drives or cloud storage services to keep your data safe. Services like Google Drive or Dropbox offer easy access to files while freeing up local storage.
To back up your files effectively, create a structured plan. Start by organizing your files into folders based on categories like work, personal, or media. This way, you can identify what is essential to keep and what can be deleted. Regular backups not only protect your data but also help in keeping your files organized and accessible.
Steps to Backup Your Files
Here are some straightforward steps to back up your important files:
- Select the files and folders you want to back up.
- Choose your backup destination, either an external drive or a cloud service.
- If using cloud storage, upload files directly through the service’s interface.
- Verify that your files are backed up by checking the destination.
Deleting Unused Large Files
Once you have identified large files and backed up necessary data, the next step is to delete the files you no longer use. Approach this task with caution to ensure you do not remove anything important. Start by focusing on files that you have not accessed in a while, such as old downloads, videos, or installation files.
Use the sorting methods discussed earlier to help identify these files. For instance, if you find files in your Downloads folder that you have not opened in months, consider deleting them. Also, check your desktop and documents folder for large files that may be cluttering your workspace.
Utilizing File Management Software
File management software simplifies the process of deleting files. Applications like CCleaner can automatically find and delete temporary files, cache files, and other unnecessary data. After installing CCleaner, simply run a scan to see what files can be safely deleted.
- Run CCleaner and select ‘Custom Clean.’
- Check the boxes next to the file types you want to delete.
- Click ‘Run Cleaner’ to remove unwanted files.
Cleaning Up After Deletion
After deleting large files, it is important to clean up the remaining data on your system. Emptying the Recycle Bin is a vital step since deleted files are still stored there until you manually remove them. Failure to do this means that the space does not get freed up.
Some systems allow you to configure automatic emptying of the Recycle Bin after a set time. This feature can help maintain your system’s performance by ensuring that deleted files do not linger unnecessarily. Additionally, running a defragmentation tool can help improve performance by reorganizing data on your hard drive, making it easier for your system to access files.
Steps to Empty the Recycle Bin
Follow these straightforward steps to empty your Recycle Bin:
- Right-click on the Recycle Bin icon on your desktop.
- Select ‘Empty Recycle Bin’ from the context menu.
- Confirm the action when prompted.
Consider using cloud storage solutions to keep your files secure while allowing easy access and freeing up local disk space.
Maintaining a Clean System Long-Term
After successfully deleting large files, maintaining a clean system requires ongoing effort. Regularly check for large files and unnecessary data to keep your storage optimized. Establish a schedule for cleaning out files, perhaps monthly or quarterly, depending on your usage.
Consider setting reminders on your calendar to perform regular checks. These small actions can have a big impact on your system’s performance. Additionally, use file management tools continuously to help manage your files effectively. For example, applications like TreeSize can help you visualize your disk space usage over time.
Implementing File Management Best Practices
Here are some best practices to follow for maintaining a clean system:
- Organize files into folders by category to easily identify what can be deleted.
- Regularly review your files and delete anything you no longer need.
- Utilize cloud storage solutions for archiving infrequently accessed files.
Building Consistency With Taking Control of Your Storage
Managing large files and ensuring your system runs smoothly is entirely achievable with the right approach. By regularly identifying and deleting unused large files, you can maintain an efficient and organized workspace. Remember to back up important data before deleting anything and implement routines that help keep your system tidy.
Taking control of your storage not only enhances performance but also makes your computing experience more enjoyable. With these tips and practices, you can keep your system clean and efficient for years to come.